
How To Install a Fireplace Mantel Bracket
Fireplace mantels are the finishing touch to any room. They’re a great addition to your space during the holidays. This is due to the practical use they provide aside from their charming appearance. If you have a mantel, you can hang stockings, garlands, and Christmas lights from it. If it’s not holiday season, fireplace mantels are still a great location for picture frames and candles. If your space is missing such an aesthetically pleasing feature, read this article on how to install a fireplace mantel bracket.
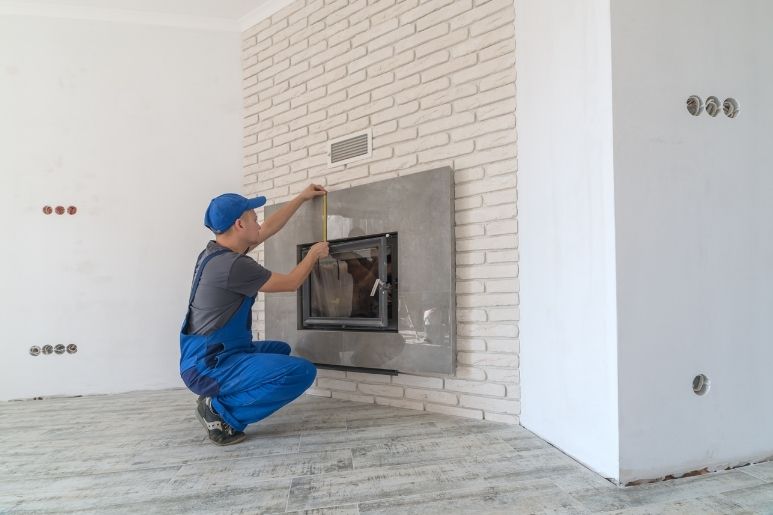
Tips To Revamp Your Fireplace
Before we jump into the step-by-step of installing a mantel bracket, consider some of the following ideas to revamp your fireplace.
Paint
The wonders that paint can accomplish are truly limitless. Sometimes all your fireplace needs is a nice coat of paint to bring it back to life. Whether you have a brick or wooden wall surrounding it, both wall types can endure a fresh coat of paint. Bright colors such as yellow or white can really lighten up your room and give it an open look.
Tile
Tile finishes are the icing on the cake. Tile brings a room together by being the first thing people notice when they walk in. With that said, don’t shy away from unique tile patterns. After all, they will only be placed surrounding the outer edges of the firepit.
Stone
If painting your brick or wooden walls is out of the equation, consider placing stone instead. You can get creative with it as well. You can rearrange their placement or choose different colors and hues of stone. It’s a great way to give your home a modern look.
Fireplace Mantel Choices
Aside from the different ways you can revamp your fireplace, you also have quite a few options for your mantel. You can opt for a more classic look, such as a wooden full-surrounding mantel piece. On the contrary, floating mantel shelves are also an option for a modern appearance.
Options for Installation
Having an idea of how you would like to transform your fireplace, including the type of mantel you’d prefer, is a necessary starting point. This will help you determine which installation method you should follow. If you’re giving your space a brand-new look that requires drywall removal, you will want to follow a wall stud installation. If you’re happy with the brick, wall, or stone that already surrounds your fireplace, you will want to follow a drilling installation.
Wall Stud Application
If you’re going for the modern floating look, you will want to follow a wall stud application. Below you will find the necessary steps to achieve this application:
- Remove the drywall to expose the wall studs.
- Using a marker, draft the lines where you will be placing your hanging mantel.
- Be sure to plan accordingly. You want to be sure the markings are placed according to your desired height preference.
- Drill a wooden block onto your wall studs. This will give your mounting plate a designated spot for placement. Be sure to keep in mind the plate measurements when doing so. This will help ensure that you place an appropriately sized wooden block.
- The mounting plate measurements are: 2 ½” x 8” x 3/16”
- Select the bolts you will be using. If you plan to use your mantel for heavy-duty purposes, go for a strong stainless-steel option.
- ¼” x 1.5” long lag bolts are recommended.
- Install your mantel brackets. Be sure to loosely apply the top and bottom screws. This will allow you to make any necessary adjustments to the angle of your mantel.
- Another thing to keep in mind is the length of your metal dowel. This is what you will be installing your mantel onto.
- The metal dowel is 9.5” long, and 8.5” of it will be outside of the drywall and 1” will be within.
- Drill holes onto your mantel. You will drill two holes on the side that will be installed onto the metal dowel.
- You will need to drill a 3/4“- 1” hole
- The size of these holes has to be exactly the same as the metal dowel, which is ¾” and made of solid steel. You want to get the most perfect fit possible.
- Slide your mantel onto the metal dowel.
- For a secure finish, consider adding an adhesive to the end. The glue will guarantee a strong hold for you while still allowing for removal if the correct pressure is applied.
- Once you have your mantel in place, take a look at your placement. Are your measurements correct? Now is the time to make any needed adjustments before you reapply the drywall.
- Remove your mantel piece from the metal dowels.
- Complete your drywall application.
- Finish any needed work on your fireplace. If there are finishing touches and additions, be sure to get those out of the way before you permanently place the mantel.
- Install your mantel back on the metal dowel for the finishing touch.
Now that you have learned how to install a fireplace mantel bracket, keep reading for some unique benefits to using our very own floating mantel brackets.
Benefits of Using Fireplace Mantel Brackets
There are many benefits to using our floating mantel brackets, aside from the appearance that modern shelf brackets provide. Below are just a few other advantages:
- Floating appearance with sturdy support
- Contains 6 mounting holes- for stronger weight capacity
- Our dowels are made of solid rather than hollow metal which prevents bending or snapping
- Can be used for other purposes aside from mantels
- Powder-coated black finish
- Designed to be mounted onto wall studs – has the capacity to be mounted on the left or right side of the stud.
Fireplace mantels are a great addition to any room. They provide aesthetically pleasing decoration as well as a unique personality to your home. Our mantel brackets come in a standard size. However, here at Right On Bracket, we can help you achieve a custom-sized bracket. And if you have any questions, give us a call, as our experts are always ready to help.

The Standard Overhang of a Kitchen Countertop
What To Consider When Selecting a Floating Shelf Bracket
Related Posts

Space-Saving Shelf Ideas for Tiny Kitchens

Quick Guide to Building and Installing a Built-In Workbench

Ways to Use Shelf Brackets as Room Dividers

What To Consider Before Installing Shelves in Outdoor Spaces

Ensuring Your Bracket Installs Meet Building Codes

Tips for Properly Caring for Granite Countertops

Mistakes To Avoid When Installing Corner Shelves
