
Installing Heavy Duty Shelves
When Do You Need Heavy Duty Shelves
In this example, we’ll be installing floating shelves that are supporting a microwave. The shelf needs plenty of weight capacity and not sag over time. We’re going to support the shelves with our Heavy Duty Floating Shelf Brackets. These brackets will attach directly to the sides of a wall stud. The shelf will then rest on the bracket arm that protrudes out from the wall. Below, we’ll be going through the steps to install these brackets and create floating shelves with a very high weight capacity.
Finding Wall Studs
Before opening the wall, use a studfinder to locate the studs and plan your project. You don’t want to open the wall without knowing where your brackets will go! If you notice in our project, we’re working in a small space and we want to make sure the brackets will fit. We sell both left and right side mounts and we chose the sides with the most room to work with.

Cut and Remove Drywall
Now that you know where the studs are, cut the drywall in a neat square and remove it. You can potentially reinstall this piece of drywall, or buy a replacement piece. Drywall comes in a few different sizes, so measure the thickness to ensure you buy the right size.

Mark Bracket Installation Location
Mark the location you want the brackets installed. Run a level across from one stud to the next where you will install the base of the mounting plate. This will guide you and ensure when you install both brackets, they’re perfectly level.
Install Heavy Duty Floating Shelf Brackets
After you dry fit the brackets and mark the locations, install the bracket. We recommend use a drill bit to pre-drill the holes so your screws are easy to install. This will also ensure the screw goes in straight and doesn’t effect the location of the bracket.
For this installation, we’re using #12 Wood Screws 1 1/2″ long. These screws fit the 1/4″ holes perfectly and are plenty strong to support the weight we need. Each bracket has 6 mounting holes, which will create a strong mount we need to support a microwave easily.

After 1 bracket is on, hold up the other bracket on the lines you drew with your level. Run a level from one bracket to the other and ensure it’s level. After you mount the bracket, it may be just above or below your line, so adjust you other bracket mounting location accordingly.

Staining Butcher Block Oak Shelves
We used several strips of oak and bonded them together to create these butcher block shelves. They were then put through a planer and sanded for a smooth finish. They’re all stained with oak danish oil for a bold finish. You can use a polyurethane finish, which will waterproof the shelves better.
Dry Fit Shelves
Once your brackets are installed, dry fit your shelves and put your level on top. Make and adjustments you need to make sure the shelves are level. You’ll be re-installing the drywall and won’t be able to adjust them. (In this photo there is already drywall installed. This stage will not have drywall yet).

Wiring For Lights
In this project we’re hardwiring a light to install under the shelf. Shelves this big block a lot of light, so we recommend doing something like this to brighten it up. This project will be a breakfast bar with a toaster and espresso machine, so we want plenty of light.
Installing Drywall Around Brackets
Prepare your drywall and install around the brackets. We recommend using drywall clips, as they ensure a strong finish for the replacement drywall to mount to. Cut the drywall around the brackets as close as you can. You’ll notice we left small holes and it’s not perfect, but that’s ok in this situation because we’ll be adding a backsplash. If you’re not installing a backsplash, spend time on this step to make sure the texture matches the rest of your wall.

Installing Wood Shelves
Set your shelves on top of the brackets. You can use liquid nails or small wood screws to hold the shelf in place. We used small screws and pre-drilled the wood shelves. This was to ensure the screws go into the shelf nicely and it doesn’t split.
Add Backsplash Tiles Behind Shelves
You can either backsplash behind the shelves or around them. These shelves were measured with the back wall in mind and not the backsplash, so we installed the shelf first. Install backsplash right up against the bracket. The bracket is plenty strong so you won’t worry about sagging in this application.

Calk Around Shelves
Once the backsplash is installed, grout and calk around the edges. There will be no water running near this shelf, but we still calk around the edges to make sure no moisture gets into the edges of the wood.
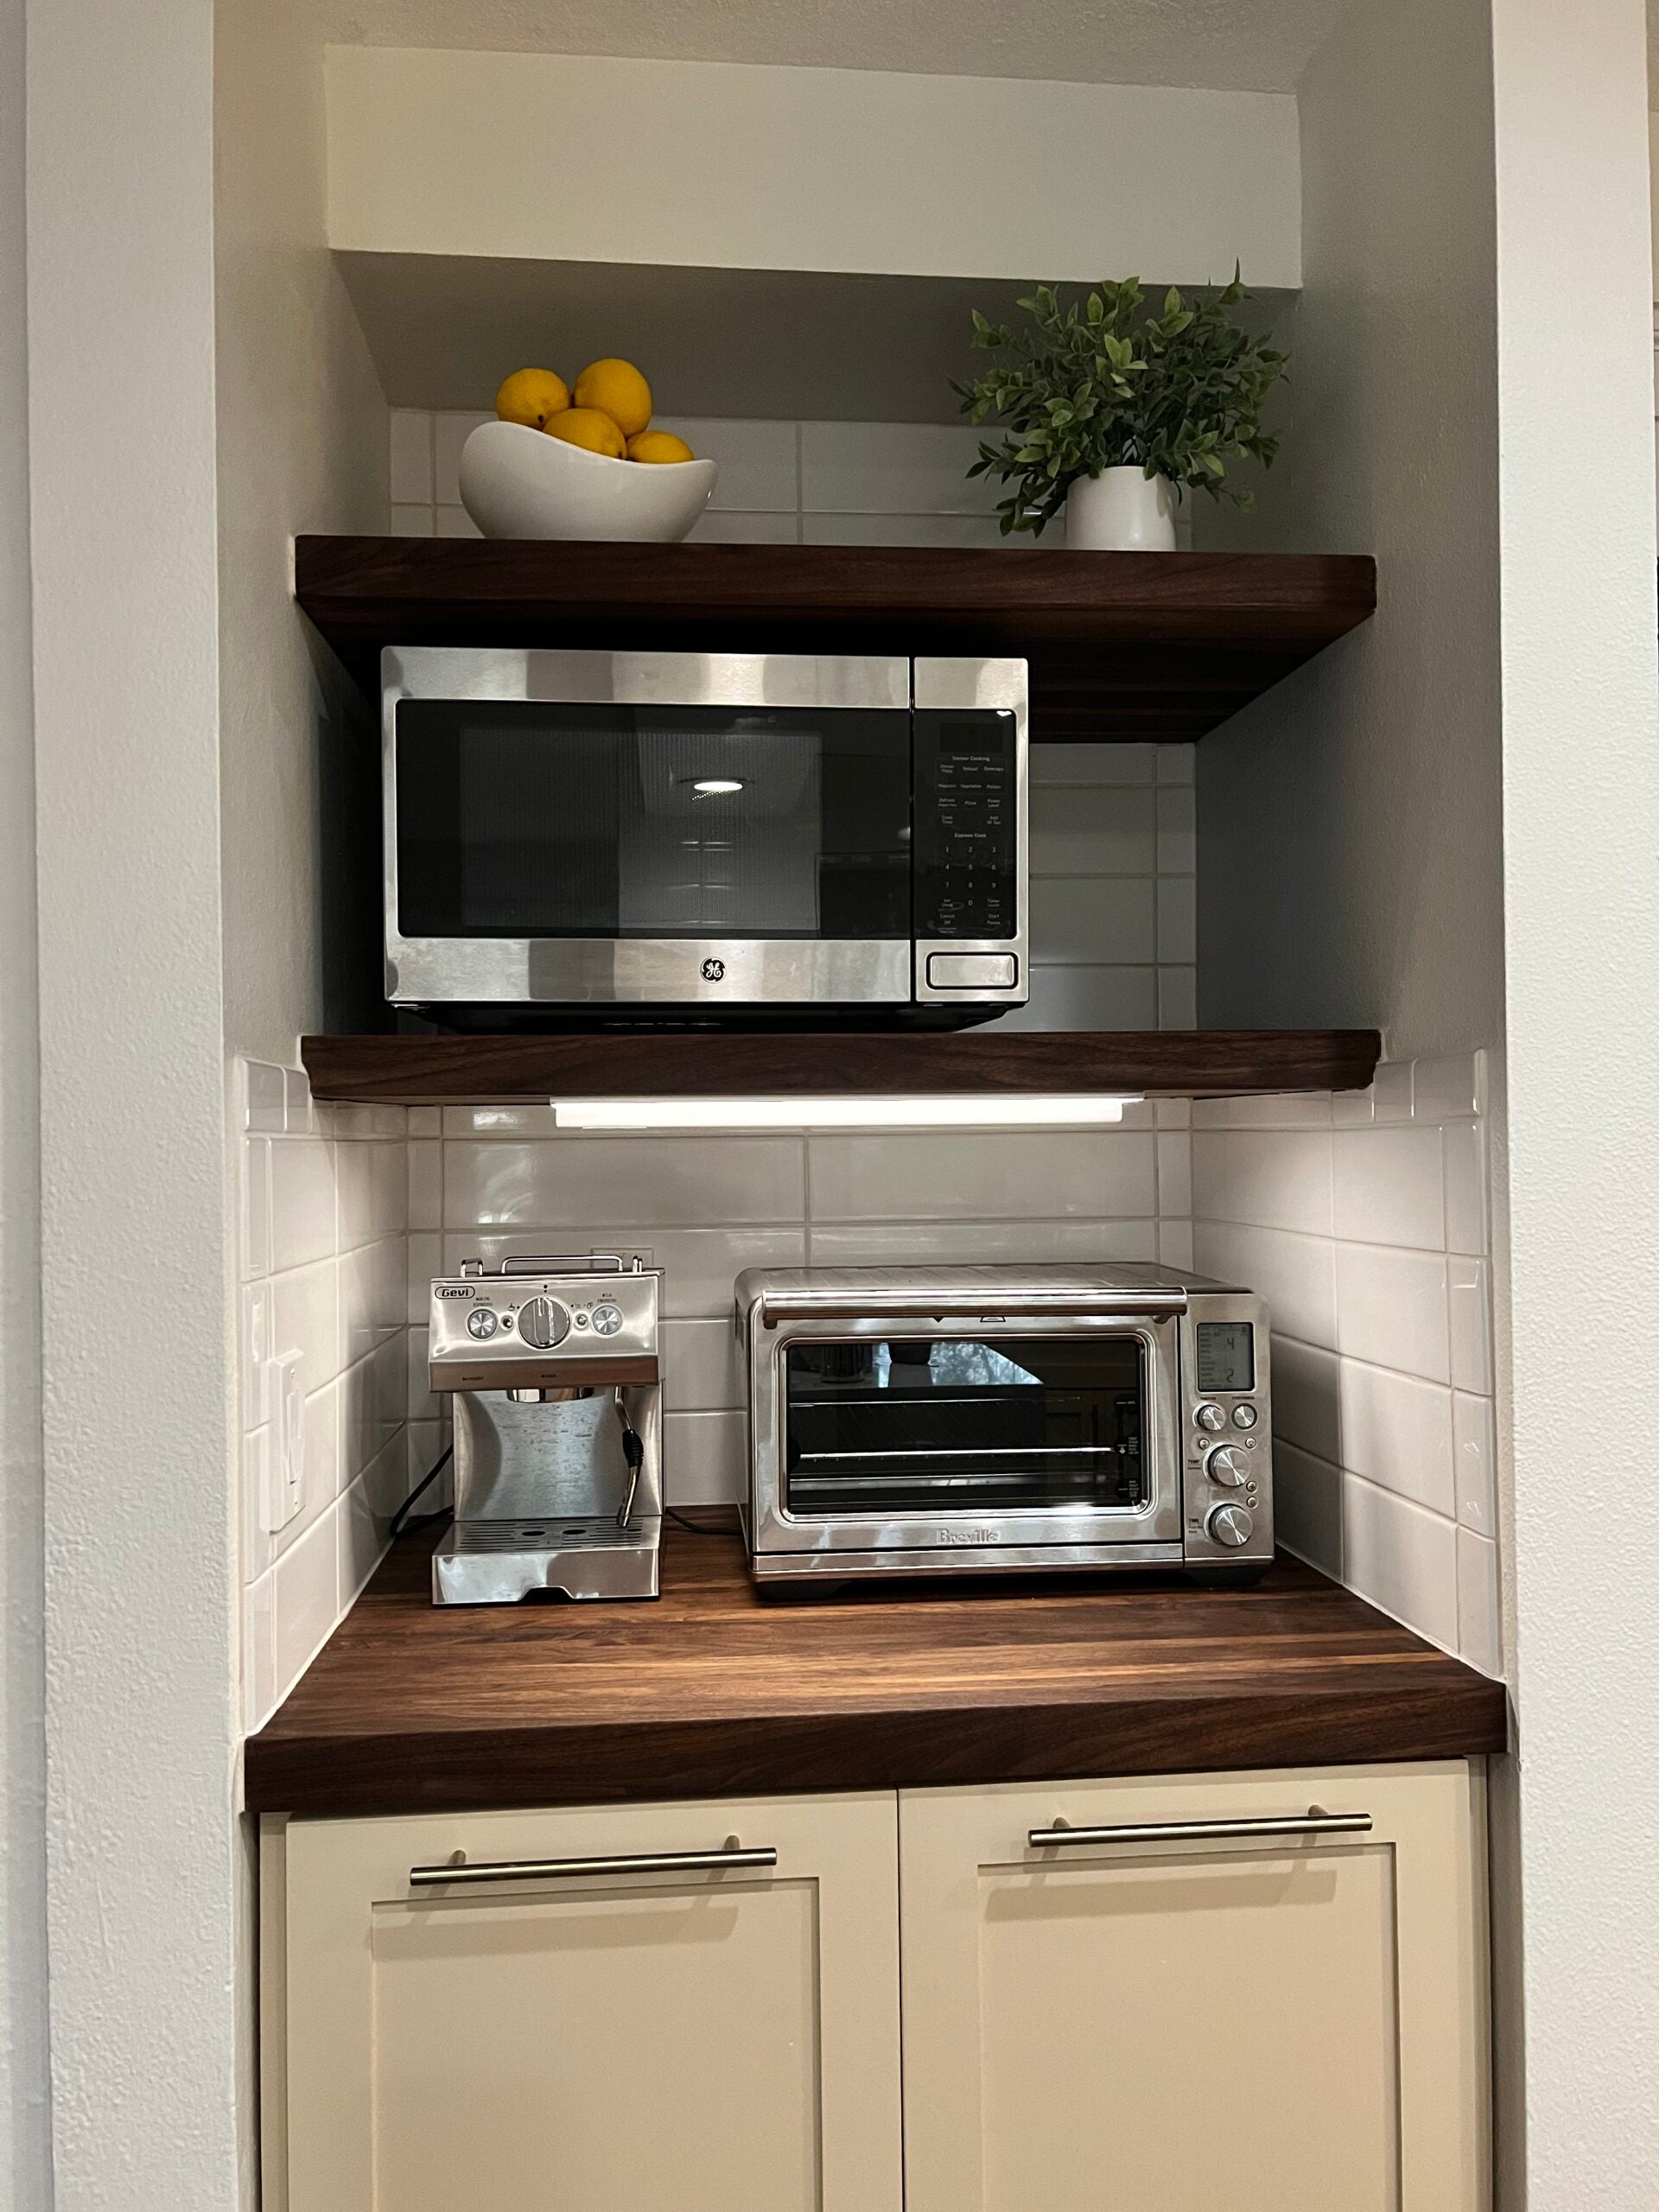
Adding Appliances To Shelves
Finally the shelves are ready to be put to use. We installed a microwave on the second shelf, with a toaster oven and espresso machine on the butcher block below. The heavy duty floating shelf brackets are hardly in view and support well over 200 pounds and support any small appliance with ease!

Ways To Make Your Kitchen Look More Luxurious
Effective Ways To Make an Outdated Kitchen Look Modern
Related Posts

Space-Saving Shelf Ideas for Tiny Kitchens

Quick Guide to Building and Installing a Built-In Workbench

Ways to Use Shelf Brackets as Room Dividers

What To Consider Before Installing Shelves in Outdoor Spaces

Ensuring Your Bracket Installs Meet Building Codes

Tips for Properly Caring for Granite Countertops

Mistakes To Avoid When Installing Corner Shelves
