
A Look at Stud Spacing and Bracket Installation
When it comes to installing shelves, cabinets, and other heavy fixtures on walls, the structural integrity of your mounting system depends on how well you understand stud spacing and the proper techniques for bracket installation. With an in-depth look at stud spacing and bracket installation, along with a practical approach, you can tackle these tasks with confidence.
Why Stud Spacing Matters
Studs support everything you mount on the walls. Standard stud spacing in most homes is 16 or 24 inches apart—knowing this spacing is crucial when you’re planning any installation.
For lightweight or medium-weight fixtures, smaller stud spacing can make installations faster and more secure. However, for larger shelves or cabinets, accommodating wider spacing is essential to distribute weight evenly and prevent undue strain on the brackets.
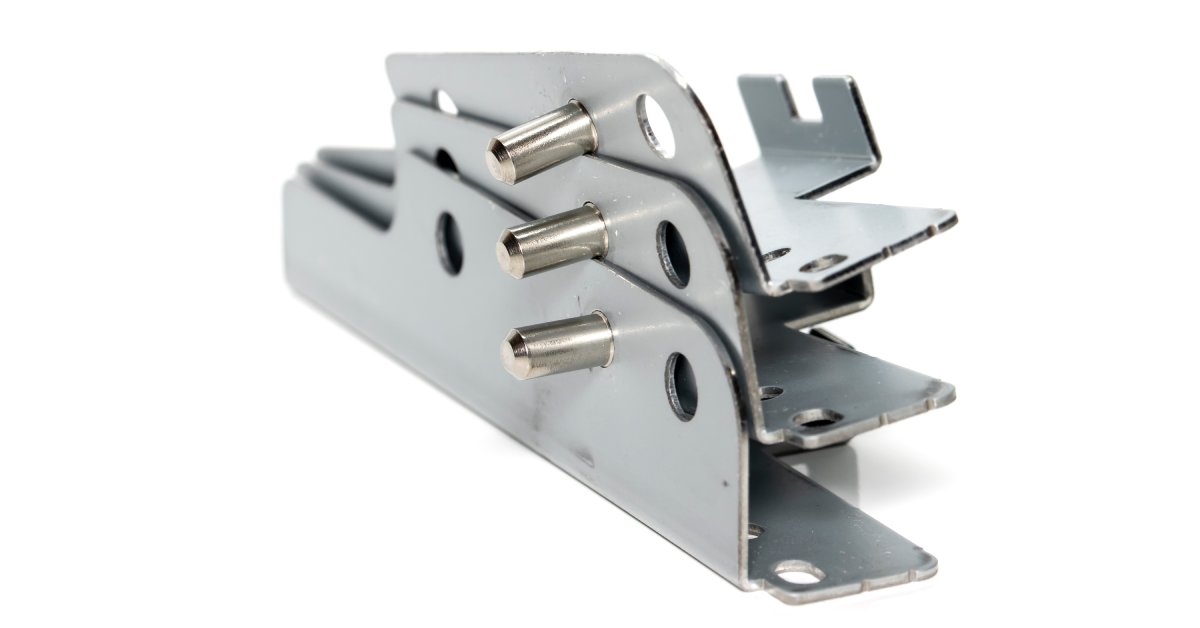
Proper Spacing Supports Even Weight Distribution
If you want to mount floating shelves, for example, you can complete the project with heavy-duty floating shelf mounting brackets from a reputable supplier like Right On Bracket.
Our brackets are durable enough to support the weight of even the heaviest items placed on shelves. Not to mention, they deliver a minimalist touch by providing a clean, unobstructed look since the hardware remains hidden.
Key Steps for Bracket Installation
Bracket installation is about more than just drilling holes and inserting screws. You must select the right brackets for your project. Standard bracket designs can suffice for lightweight items, while heavier loads require heavy-duty brackets for added strength.
Take Accurate Measurements
Before drilling into the wall, make sure your measurements and markings are aligned and balanced. Use a level to double-check your markings, and drill pilot holes to make screwing into the studs easier and to minimize the risk of splitting the wall material. Finally, ensure you use screws of the appropriate length and gauge, as inadequately secured brackets can compromise the entire setup.
What About Non-Stud Installations?
After reviewing this look at stud spacing and bracket installation, you may wonder about situations where studs are not available. Here, anchors are your solution.
Drywall anchors, toggle bolts, and molly bolts are excellent alternatives depending on the weight and purpose of your installation. However, keep in mind that these options are not as strong as anchoring directly to studs, so try to limit their use to lighter or decorative items.
Tips for Long-Term Stability
Whether you’re hanging a floating shelf or installing a row of sturdy cabinets, paying attention to stud spacing and bracket choice is essential. Maintain the integrity of your installation by periodically inspecting brackets and screws and looking for signs of loosening or wear. Tightening screws and replacing worn components promptly will allow you to keep the installation in top shape.
From locating studs to securing hardware, each step in the process contributes to a safe and functional wall-mounted system. Proper planning and the right tools help you avoid future headaches and ensure your installation can stand the test of time.