
How To Hang Your Shelving Like a Professional
If you’ve been eyeing those empty patches of a wall in your home, imagining the perfect spot for a shelf carrying your favorite books, knickknacks, or plants, you’re in the right place. We’ll explain how to hang your shelving like a professional. By the end, you’ll have the skills and know-how to hang shelves like a pro, ready to transform those bare walls into practical, charming displays of your personality and style.
Gather the Necessary Supplies
Before embarking on your shelving project, gathering all necessary supplies and materials is essential. These supplies could include the shelf itself, brackets, a level, a stud finder, wall anchors, screws suitable for the shelf’s weight, a drill, a pencil, and a tape measure. The type of wall you’re working with (drywall, plaster, or masonry) will dictate the specific type of anchors and screws needed.
A level is crucial to ensure your shelf is straight, while a stud finder can help secure your shelf safely by helping you locate the studs in your wall. The correct drill bit size is essential to prevent wall damage and ensure a snug fit for your anchors. Preparation is key in any do-it-yourself project, and your shelving installation is no exception.
Select an Ideal Location
Selecting an ideal location for your shelving is a critical step in the installation process. The right spot enhances room aesthetics, functionality, and safety. A poorly placed shelf can obstruct pathways, create awkward spaces, or even pose a risk if it’s in a spot where it could end up easily knocked down.
Consider placing shelves in living areas where you can display cherished photographs or in the home office for easy access to books and documents. If you’re a plant enthusiast, placing shelves near windows can provide a perfect spot for your green friends. Your chosen location can greatly influence the room’s overall harmony and usefulness.
Locate Wall Studs
Locating the wall studs is a crucial and often underemphasized step in the shelving installation. Wall studs are vertical frames in the wall’s structure and are significantly stronger than the drywall or plaster that covers them. Securing your shelf to these studs can enable them to bear heavier loads without risking damage to the wall or causing the shelf to collapse.
To locate wall studs, you can use a stud finder, an electronic device that detects changes in the wall’s density. Move the stud finder horizontally across the wall and mark the spots where it indicates a stud. Do this at several vertical levels to ensure accuracy. To have a strong, secure, and safe shelf, finding and using the wall studs is an imperative step.
Take Appropriate Measurements
Taking appropriate measurements is the next critical step in the shelf installation process. Accurate measurements ensure the shelf fits perfectly in the desired space and hangs exactly where you want. To begin measuring, hold your shelf against the wall at the selected location and mark where the ends of the shelf meet the wall.
If your shelf requires brackets, place them at their designated spots on the shelf, hold this up to the wall, and mark where the screw holes are. Measurement accuracy is paramount, as even a small mistake can lead to an uneven shelf or unnecessary damage to your wall.
Install Screws or Anchors
Installing screws or anchors is the next critical step when hanging your shelving. If you use wall anchors, you’ll likely need to pre-drill holes first. Wall anchors support the weight of the shelf and its contents, and they need to fit snugly into the wall to do so effectively. You’ll need to use a drill bit that’s the same size or slightly smaller than the wall anchor.
After pre-drilling the holes, insert the wall anchors. They should fit tightly and flush with the wall. If you’re screwing directly into a stud, you may not need to use wall anchors. However, you must still pre-drill holes to avoid splitting the wood. Whether you’re using wall anchors or screwing directly into studs, this step ensures that your shelving attaches securely to the wall and is capable of supporting weight without risking damage to the wall or the shelf itself.
Add Your Mounting Brackets
Adding your mounting brackets or shelf supports is the next step in the shelving installation. This process is crucial because these brackets will bear the weight of your shelf and its contents, directly contributing to its stability and strength. Start by placing your shelf on the brackets or supports, aligning the screw holes of the brackets with the marks you previously made on the wall. Using a screwdriver or drill, fasten the screws through the holes in your brackets into the pre-drilled holes in the wall or the wall anchors.
If your shelf has specific spots for the brackets, align them correctly. If it doesn’t, ensure that you equally space the brackets and that they’re level to ensure the shelf will sit evenly. Remember to double-check with your level to ensure everything is straight.
Install the Shelving
Now that you’ve securely mounted and leveled your brackets, it’s time to install your shelving. Position your shelf on the brackets. If your shelf has pre-drilled holes for the screws, align these with the corresponding holes on the brackets. Using a screwdriver or drill, fasten the screws through the shelf and into the brackets. If your shelf doesn’t have pre-drilled holes, you can secure it with fasteners for added stability. These fasteners, often L-shaped, attach to the underside of the shelf and the wall to provide additional support.
Before tightening all your screws or fasteners completely, use your level one last time to ensure that the shelf is perfectly horizontal. Once everything is level, tighten all screws or fasteners securely. This final step ensures that your shelving is beautifully installed, sturdy, and reliable.
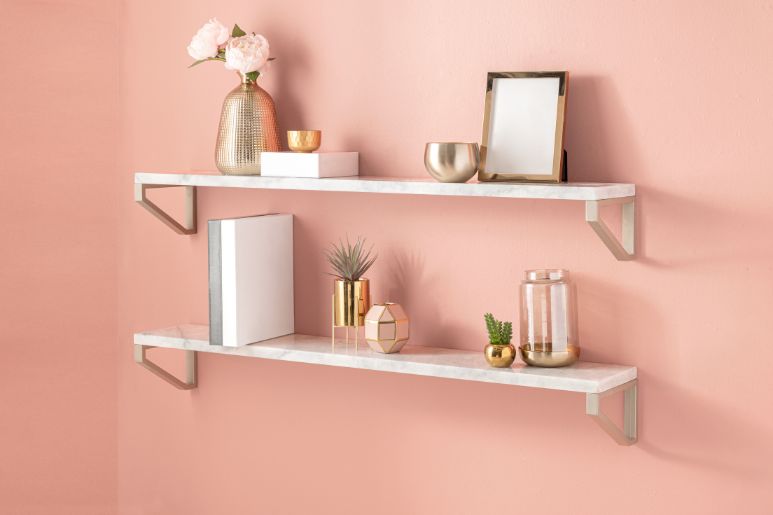
Decorate Your Shelves
With your shelves now securely installed, it’s time to bring them to life with your personal touch. Use this newfound space to display your favorite books, highlight cherished mementos, or organize your essentials neatly. Consider adding small indoor plants for a touch of nature or perhaps some framed photos to capture precious memories. If you’re using the shelves for organization, baskets or bins can be stylish and functional additions.
The goal is to strike a balance between aesthetics and functionality. Your shelves should not only look beautiful but also serve their purpose effectively. Whether in the living room, kitchen, or home office, your personalized shelves can elevate your space, adding charm and character to your house.
Now that you have a guide to hanging shelving like a professional, you can begin the process confidently. Check out Right On Bracket’s selection of wall brackets for shelving today. The key to successful shelving installation lies in careful planning, accurate measurements, and careful execution. So go ahead, roll up those sleeves, and get started.

5 Signs It’s Time To Upgrade Your Kitchen Countertops
3 Tips for Determining How Long of a Bracket You Need
Related Posts

Space-Saving Shelf Ideas for Tiny Kitchens

Quick Guide to Building and Installing a Built-In Workbench

Ways to Use Shelf Brackets as Room Dividers

What To Consider Before Installing Shelves in Outdoor Spaces

Ensuring Your Bracket Installs Meet Building Codes

Tips for Properly Caring for Granite Countertops

Mistakes To Avoid When Installing Corner Shelves
