
How To Make Your Garage Feel Larger With Shelving
If your garage is starting to look more like a storage closet than a garage, then it’s time for a makeover. Many homeowners struggle with their garage spaces being disorganized, cluttered, and feeling cramped, so if that’s you, you’re not alone. There are easy ways to tackle the disorganization and clutter, but when it comes to fighting the cramped feeling, the issue is more difficult to fix. Luckily, we have the solution for you: shelves. Find out how to make your garage feel larger with shelving and how you can install shelves easily in your own space.
Declutter
First things first—you’ll want to declutter your garage space as much as possible. You need to clear the way to the walls if you want to hang shelves. This is the perfect chance to tackle that decluttering project while you’re at it. Take the opportunity to sort through any boxes, bins, and free-standing items around your garage, deciding what to keep and what to toss or donate. Any items that you don’t regularly use can be donated or stored elsewhere. Keeping your garage floor clean is an important step because it is another way to help your garage appear bigger.
Build Up, Not Out
After taking the time you need to clear the floor, keep it that way by focusing your attention on the walls. There are plenty of options for moving your storage vertically, such as the shelving we will be walking you through today. Some home garages have attached attics, which is a great alternative for storage above the garage floor. Beyond shelves, adding hooks, cabinets, and bike racks are ideal options for storage as well. If you have the free wall space for it, try a combination of these.
Installing Shelves
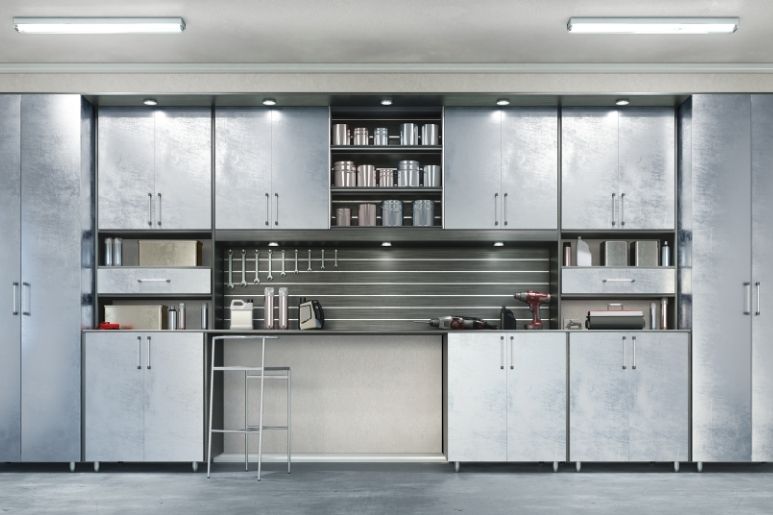
Now that you have decluttered and freed up the wall space, it’s time to select and hang your garage shelves. Have some fun with this step. Try approaching it from an interior design angle. What kind of shelves would complement your garage space? Since you want to help your space look larger, you could go with white metal or plywood beams. White reflects the natural lighting and helps a space appear bigger, which is why many homeowners choose to paint their garages and home interior white. If you would prefer a more industrial look, go with a darker metal or simple plywood.
What You Will Need
Once you have decided on your shelves of choice, here is what you will need for the installation project. Make sure you have a screwdriver, screws, stud finder, level, and hand drill ready. If you don’t have a stud finder or there are no studs available along your chosen wall, you can also opt for drywall anchors for support. Have a pencil or other drawing utensil to mark where your screws will go. To support the shelves, you’ll need modern shelf brackets fit to the length, width, and depth of your shelves. Measure your shelving materials carefully, as different types of brackets hold different amounts of weight.
How To Install
- Decide where you want to place the shelf. Survey the wall with the stud finder until you find an appropriate spot (if you can’t find any wall studs, place the drywall anchors).
- Place the shelf against the wall in the desired spot. Check with your level to make sure it is straight across, then make a mark with the pencil along both ends of the shelf.
- Place your shelf brackets in relation to where you marked with the pencil. Make another pencil mark inside each of the screw holes on the bracket. Step away with the shelf and brackets.
- Drill a starter hole to coincide with the bracket pencil marks.
- Place the bracket back on the wall where you made the holes. Insert the proper screws into the bracket’s holes and tighten.
- You can now place the shelf onto the wall bracket. Make sure it’s centered and test again with the level.
You should have calculated the weight limit in advance, but when you go to place your items on top of the new shelf, proceed with caution. Make sure the shelf doesn’t buckle under too much weight as you apply it. Add your items one at a time until you know it’s safe to proceed.
Storage Ideas
Now that you have your shelves in place, you can shelve the items that previously littered the garage floor. Don’t just throw everything on top of your beautiful, new floating shelves, though. Pick up a couple of plastic or decorative storage bins to deposit your items in. If installed correctly, your new shelves should be stable and secure, but it’s still unsafe to reach up for heavy belongings more often than needed. You can keep items that you often use nearby on a workbench, so they are within reach. However, pack away items like seasonal decorations and other less often used belongings, as they will just take up space and look out of place.
Label Everything
Make sure to label your storage bins and other containers for easy accessibility in the future. If you do end up needing an item that you’ve packed away, you’ll be able to find it quickly and easily with the help of this labeling system. Labels also help promote organization in the future, as you’re less likely to throw clutter into a nicely organized and labeled box.
Homeowners often neglect their garage spaces, but not anymore. We hope this guide on how to make your garage feel larger with shelving has inspired your own garage makeover. By following these steps, you’ll soon have the nicest garage in the neighborhood. The best part about utilizing shelving in your garage space is how easy and quick the installation is. If you are in search of the ideal shelf brackets for your space, check out Right on Bracket. We offer a large variety of floating and traditional shelf brackets for use all around your home, including in the garage, kitchen, bathroom, bedrooms, and more. You can trust our sturdy shelf brackets for all your hanging jobs.

Reasons To Consider a Floating Office Desk
The Different Materials Used for Fireplace Surrounds
Related Posts

Space-Saving Shelf Ideas for Tiny Kitchens

Quick Guide to Building and Installing a Built-In Workbench

Ways to Use Shelf Brackets as Room Dividers

What To Consider Before Installing Shelves in Outdoor Spaces

Ensuring Your Bracket Installs Meet Building Codes

Tips for Properly Caring for Granite Countertops

Mistakes To Avoid When Installing Corner Shelves
